
Appointments - wiki.matching.fieramilano.it
Appointment management is the key activity of your My Matching Agenda. Here we’ll be explaining how to:
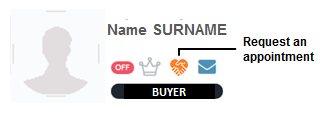
Requesting an Appointment
- On the Buyer’s profile, click on
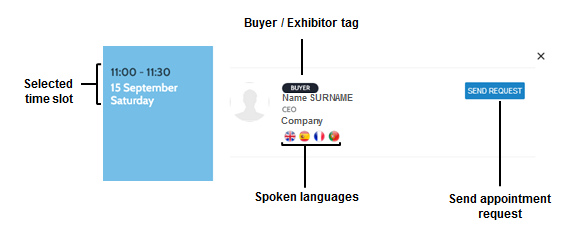
- Choose the available time slot that suits you best

This view shows your agenda and the agenda of the other user, overlaid to show the time slots both of you have free.
- Check the date and time of the appointment and confirm to send the request
- Wait for the other user to confirm or decline the appointment request.
It’s advisable to visit My Matching daily to get the most out of the platform.
Managing Appointments
The Appointments to be managed can be viewed in two ways:
- Using the Notification function on the User Bar
- Using the My Agenda widget on the My Matching Dashboard
To manage appointment requests, click on VIEW APPOINTMENTS .
The screen that appears shows you your agenda with all the appointments, both those already confirmed and those still to be managed.
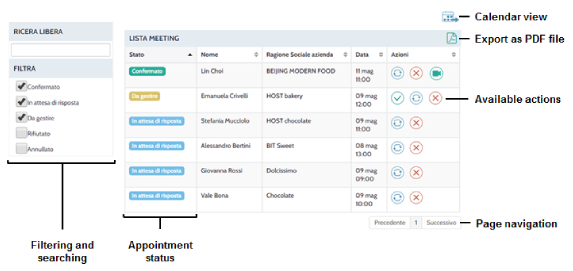
On this screen, you can:
- Look for and filter appointments
- Manage appointments using the action buttons
- Export the agenda in PDF format
- View the agenda as a calendar
Appointment management actions
 Confirm
 Reschedule
 Decline / Cancel
Status of Appointments
- Confirmed the request has been accepted by the other user
- To confirm you have received a request you must Confirm, Reschedule or Decline
- Waiting for reply you have sent the request to the other user
- vCancelled the appointment has been Cancelled
- Declined the request has been Declined
- Done the meeting has
 Done
Done - No Show
 the Buyer did not turn up at the meeting